Amazon S3 online storage is an inexpensive place for any amount of data. After creating an account on Amazon you can start storing data right away. There are no fixed monthly fees but you do pay a low monthly fee for any storage used and Gigabytes transferred.
S3 can be specified as the left or right side of the synchronization. When using S3 for backup (upload to the cloud), it is recommended to use the right side for S3.
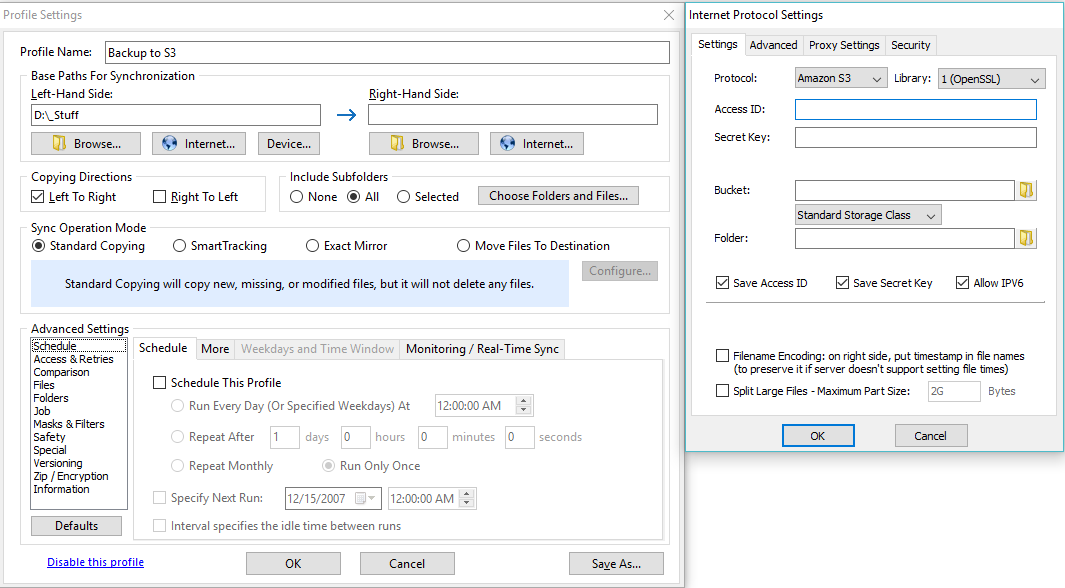
Click on the Internet… (world icon) button to configure the Amazon S3 access. In the dialog box that appears, please change the protocol from FTP to Amazon S3. Specify the desired bucket name and your S3 credentials.
Configuring Amazon S3 with High-Sync
S3 Compatible Services
There are any number of S3 compatible cloud providers popping up. Many are less expensive or may have the advantage of being located in a specific geography. S3 compatible services are supported by using a different type of bucket name. They are specified with an @ symbol as your bucket name: For example bucketname@cs.hosteurope.de. Note that S3 compatible services may a 5GB file limit. Look here for discussion and work around. For a detailed walk through of Wasabi (one of several compatible S3 services) look here. You may also be interested in creating a server of your own with S3 storage on it.
Buckets
Amazon S3 storage is divided into units called buckets. Each customer can create 100 buckets. However, you must find bucket names that no other customer has chosen yet. Within a bucket, you can store any number of folders and files.
Credentials
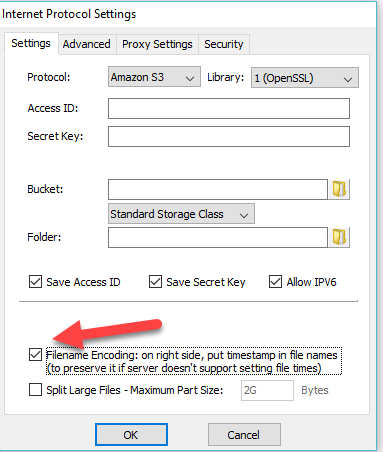
On the Internet Protocol Settings dialog, you can enter your S3 access details. You can retrieve the credentials on the Amazon S3 web site. You will probably want to choose options Save Access ID and Save Secret Key. It’s a good idea to store these on a USB key or in a safely backed up spot because without them you won’t be able to access your account.
Preserving File Dates and Times on Amazon S3
Filename Encoding – Preserving Timestamps, Versioning
Since S3 storage is bucket and object oriented, by default it does not preserve the dates files were created or modified because there is no “metadata” stored for the files. If you would like to preserve your files’ timestamps on Amazon S3, you should choose the High-Sync option Filename Encoding. This also allows you to using versioning by keeping multiple versions of each file in backup storage, each with a synthetic name that has the date of the file embedded in the filename. The file is renamed to the original name when it is restored with High-Sync later on. Our S3 5GB limit document shows a screenshot of how files are renamed.
Compression / Zipping / Encryption
If you want, your files can also be zipped and encrypted. You will find these options on the Zip tab sheet. When combining compression with filename mangling, you must compress each file into a separate Zip file. So you should only use the two upper checkboxes on the Zip tab sheet.
Speeding things up with the Destination Cache
You can speed up reading the file list with the setting “Cache Destination File List…”. This can be used when you are uploading to a remote folder only from one local PC by doing regular backups.
Restoring Files From Backup Storage
Restoring files from a backup is done by copying in the opposite direction. Normally, the restore operation copies from the right-hand side back to the left-hand side. For more about restoring click here.